Roman Glass Bowl
Project Duration: 50 Hours
Date: Late Roman Era
Dimensions: L: 300mm W: 300mm D: 55mm
Materials: Glass
Object Description:
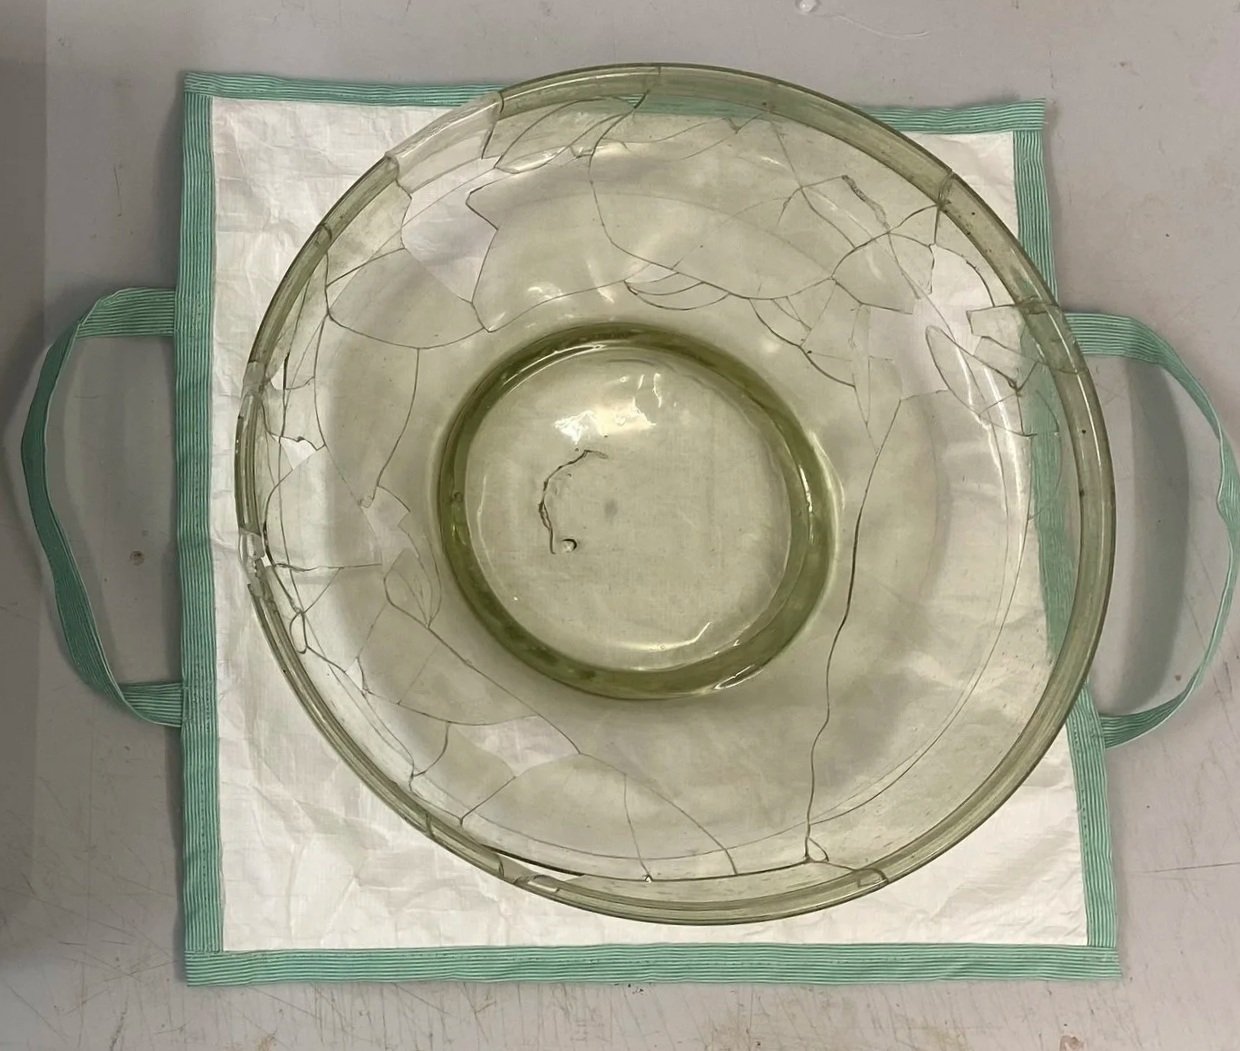
This bowl of from the Late Roman period but does not have a recorded provenance,
possible locations could be Oxyrhynchus or Qua el-Kebir. Bowl was previously reassembled but adhesive and joins did not hold.
Condition:
At present, there is a total of 24 reassembled and disassociated sherds. Smaller sherds have been placed in bags with padding. Despite cleaning, there is some limited soiling (debris) specifically within the rim. Disassembled sherds are clean with no signs of residual adhesive (Paraloid B72 was previously used). While previous joins are seemingly in good condition and appear relatively stable, one failed for no apparent reason (i.e. no force was applied, it failed on its own volition). Little adhesive is apparent on either side of the failed join. Given this, previous joins are likely unstable, placing strain on the object. Additionally, it is noted that there is minor bubbling present along Paraloid B72 joins. While usually, this would be of little concern, there was a join fail and given the thinness of the glass, this is again likely indicative of the previous adhesive’s structural instability


Cleaning:
The fragments have been dry-cleaned using a sable brush and netted museum vacuum.
To ensure adequate strength on all joins, the object was deconstructed in an acetone solvent atmosphere overnight.
This was followed by wet cleaning with acetone on a cotton swab to remove residual debris with a focus on the interior of the rim.
Repair & Reconstruction:
The object was initially dry reconstructed to ensure proper mapping and understand the sequence of reconstruction. The object was reconstructed using an edge-to-edge method with 40% Paraloid B48N:B72 (2:1) in 50/50 IMS/Acetone.
The adhesive was applied with a brush along the joining edged then Araldite of the glass dotted 7-10mm apart and left to cure with frog tape. The sequence of reconstruction began by adhering smaller rim fragments to create larger pieces.
Once these pieces were cured, the object was reconstructed from the base up in approximately 3 stages. Between each stage (around ever 30 minutes to an hour), the joins were checked and moved if needed to ensure no steps were present and the proper alignment was met. If joins were inadequate, acetone was locally applied to the surface effectively weakening the join, fragments were cleaned and re-adhered.
Once the object had cured, residual adhesive was cleaned using a scalpel with local acetone application on a cotton swab used sparingly when needed. Cleaning began on the front when the object was secured in its temporary mount then flipped and set in a bespoke support system made of Plastazote material type squares.
Loss Compensation:
Loss compensation focused on securing voids in the rim using Hxtal details needed material type films.
Initially, three dimensional moulds of the void were created from dental wax then flattened to create a template ensuring size and shape.
A film of Hxtal detail was applied to silicon release paper at a depth of 1.5 and left to for cure approximately 54 to 66 hours until flimsy but not tacky.
The template was then used to cut the Hxtal to shape using scissors alongside No.15 and No.22 scalpels. After cutting, the 40% w/v solution of Paraloid B48N:B72 (3:1) in 50/50 IMS and acetone was applied to the edges of the film then set in place on the object supported by yellow Frog tape and clamps.
After the film had cured, the tapes were removed and void secure in place.


Acrylic Mount
A temporary mount has been created for support during treatment to support some of the weight on joins around the base and to stabilise the rim. This included the use of a shallow archival cardboard material type box filled with Kinetic sand material type moulded to nest the shape of the object.
A mount for the object has been constructed from Lumex modified polyethylene terephthalate). Initially, a plaster mould of the object was caste using the impression in the kinetic sand of the temporary mount. The Lumex was then thermoset around the mould. This mould was then cut around the edges to obtain a clean finish.
Packaging
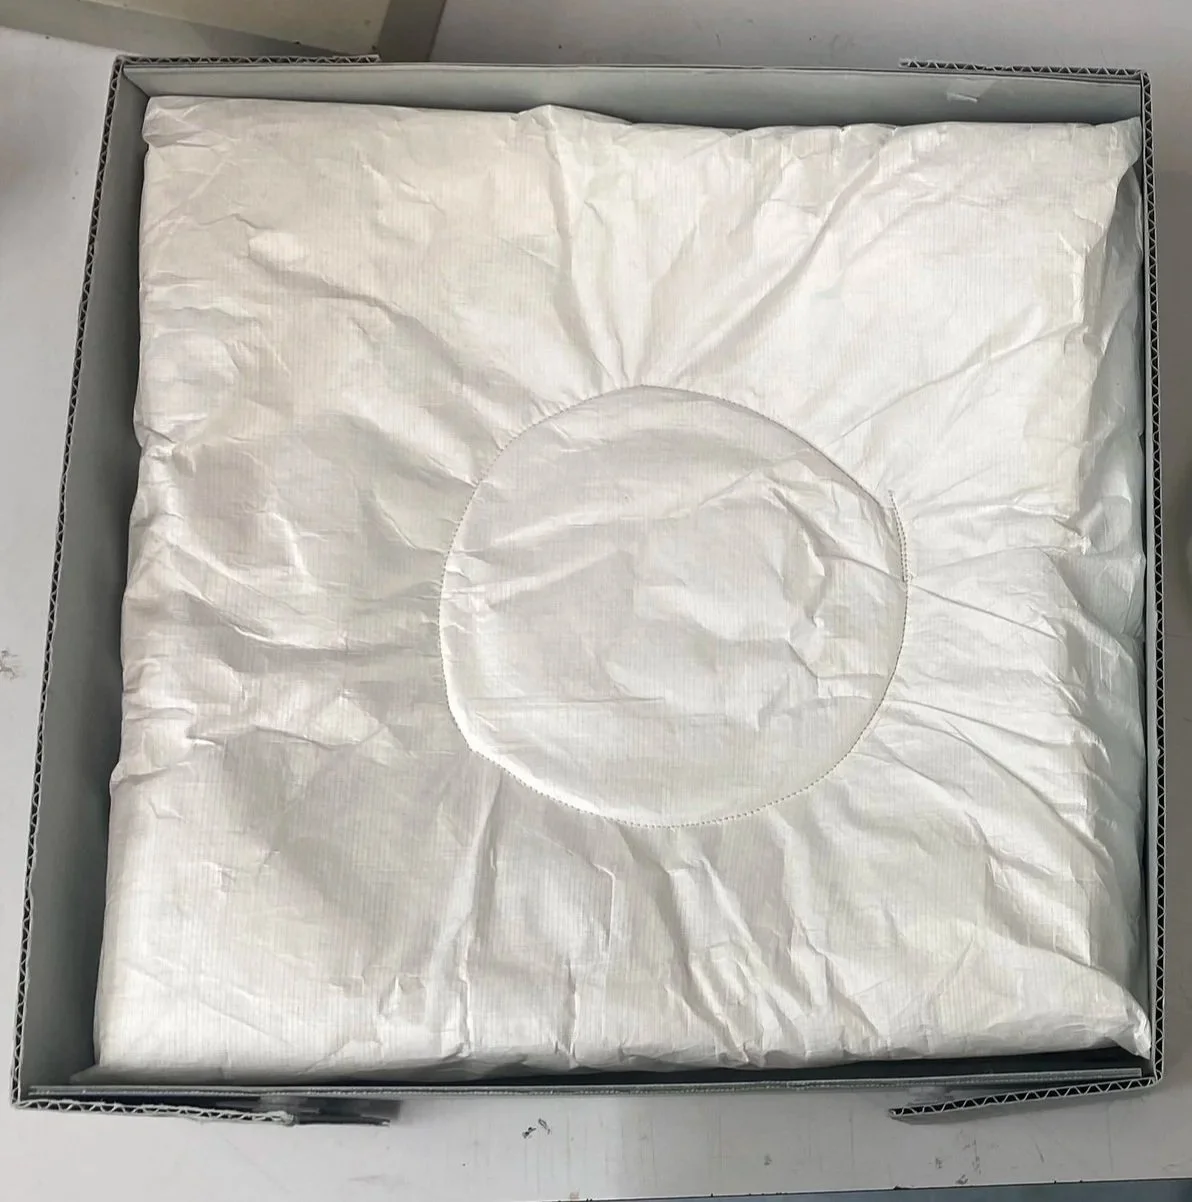
Final packaging for the glass consisted of a box composed of archival board. An ethafoam base with additional padding (covered in Tyvek) was fashioned.
To ensure safe unpacking and removal from its storage in the future, a hammock with handles was composed of Tyvek and cotton tape to rest on top of the pillow insert.
With the bowl and Lumex mount sitting in the hammock, the piece can be seamlessly lifted from the container without unnecessary lifting or unpacking which could damage the object.